
SMS2VPS Setup Guide
How to Set Up SMS2VPS on Your Android Device and VPS
Before you start forwarding SMS to another device or server, install SMS2VPS from Google Play, open the app, and complete the basic setup on your phone and VPS.
Step 1: Accept Terms and Grant Permissions
- Open SMS2VPS after installation.
- Read and accept the Terms of Use and Privacy Policy.
- Grant the required SMS permissions when requested by Android.
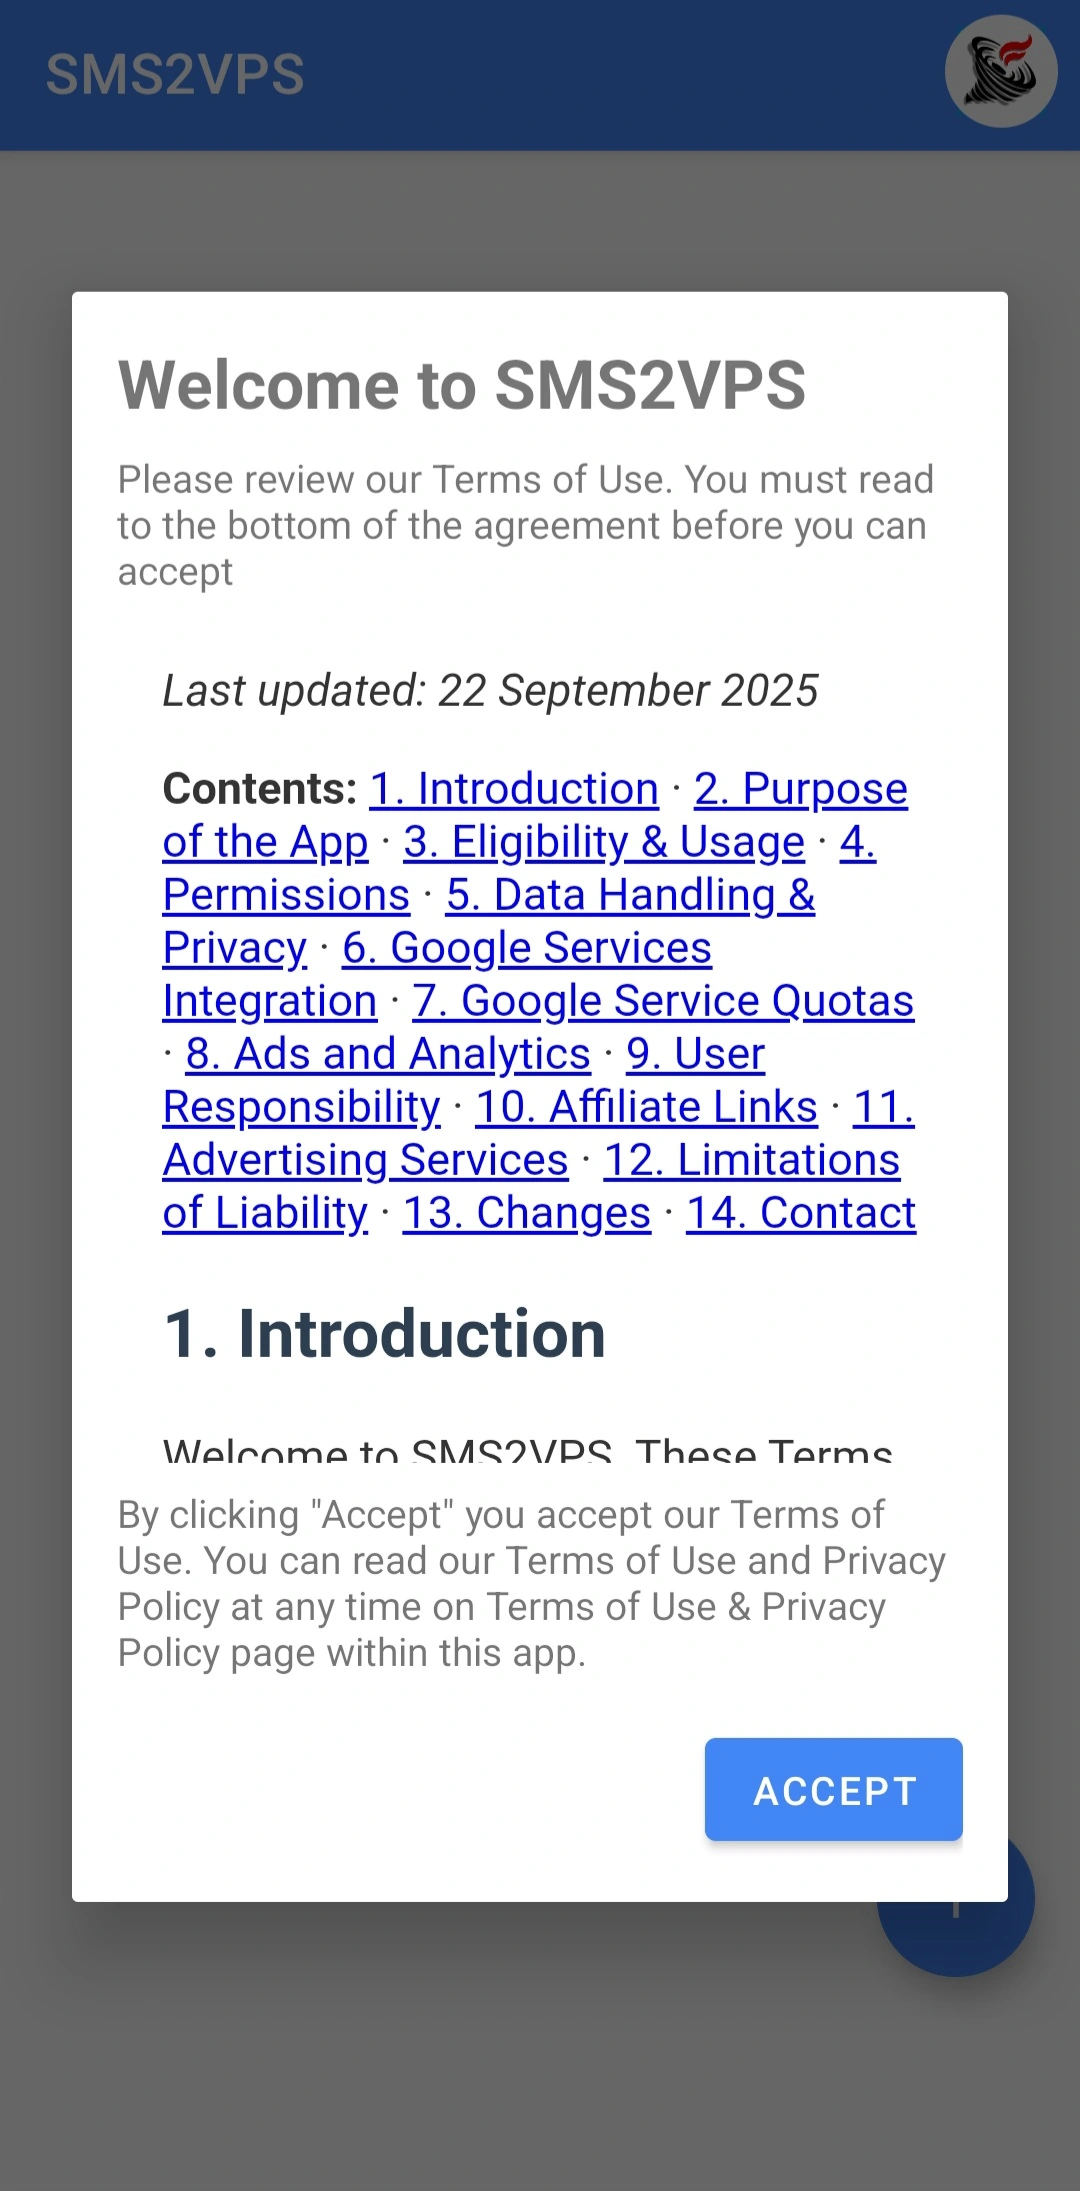
Immediately after installation, when you open the app, you will be presented with a welcome screen where you can view and accept these Terms of Use ('Terms') and this Privacy Policy ('Policy').

Here you will see all apps available for use as your default SMS app. Select the SMS2VPS application.
Step 2: Configure VPS Settings
Open the VPS Settings view from the app and fill in the connection details:
- Host/IP address: IP of your VPS or server that receives SMS files.
- Username: SSH user on that server.
- Storage path: Folder where SMS text files should be saved, for example
/root/sms. - Password: Password for the SSH user.
- Port: Usually
22on a VPS, or another port if you changed it.
After entering everything, tap the Save button in SMS2VPS so that the app remembers your settings. Then use the connection test in the app to verify that your VPS is reachable before activating synchronization.

To enable sending messages to your VPS, navigate to the VPS Settings view by tapping the logo icon in the top-right corner of the home screen.
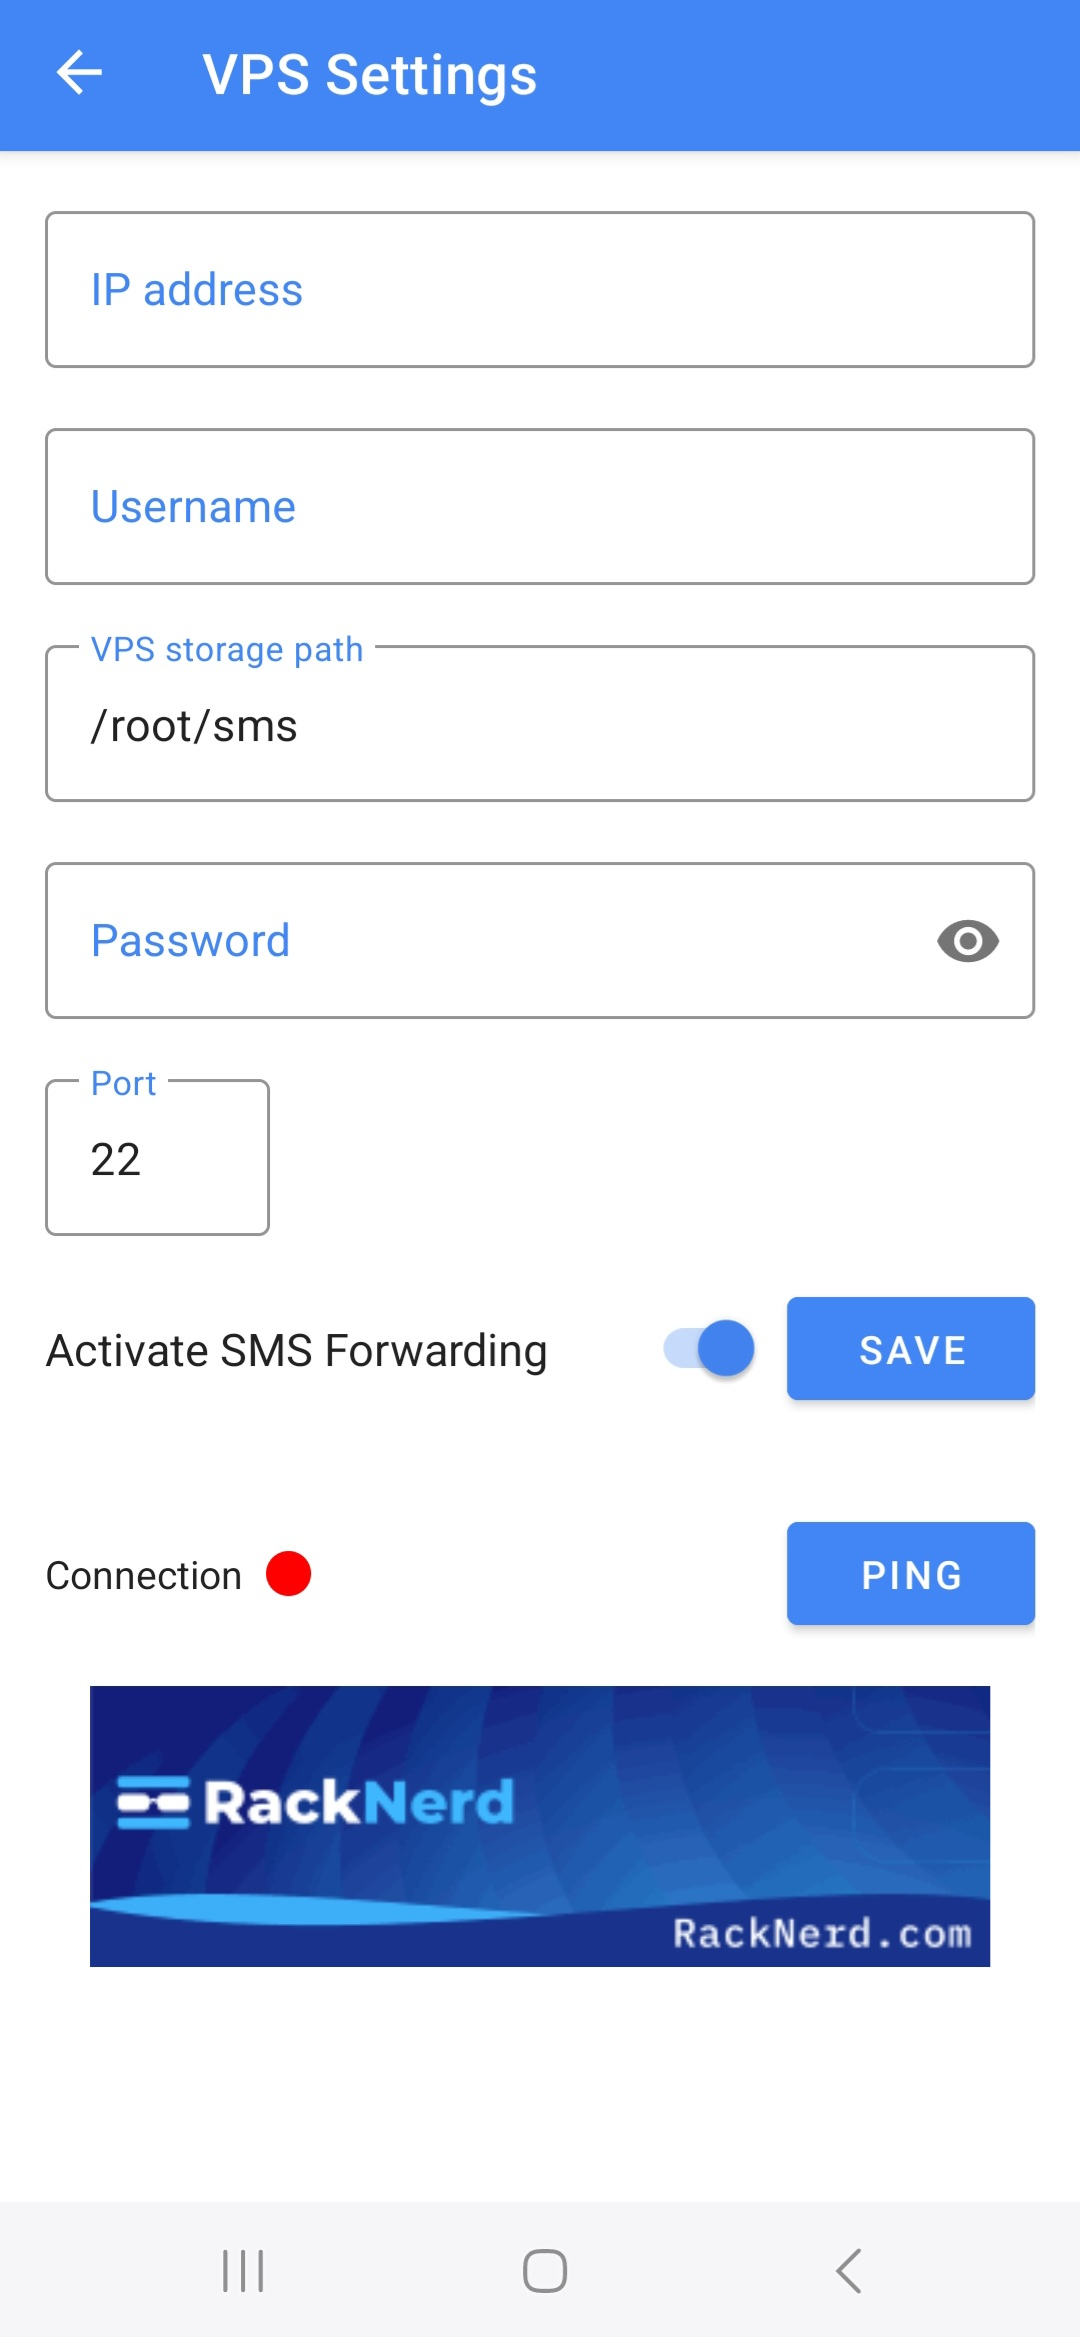
Fill in the VPS IP address, username, storage path, password, and port. The default storage path is /root/sms and the default port is 22. After entering all fields correctly, press the SAVE button so the app remembers your settings. Note that these details are required to securely send messages to your VPS using SSH authentication.
Helpful VPS Commands
Run these commands on your VPS or Linux server to find the correct values for the VPS Settings view:
# Get external IP address
curl -s https://api.ipify.org
# Get internal IP address
hostname -I | awk '{print $1}'
# Get the username of the current logged-in user
whoami
# Get the home directory path of the VPS user
echo $HOME
# Show current directory (often useful when choosing storage path)
pwd